osCommerce is a popular eCommerce management system. It allows you to create and manage an eCommerce store on the internet. Right now, osCommerce powers more than 20000 eCommerce stores on the internet operating around the world. It also has thousands of free add-ons to improve the functionality of your store without worrying about technical difficulties.
On the internet, you can do business wherever you want. If you want to promote products of your eCommerce store in some different countries or states, you can do so. But before actually selling the products in any region, you must know the tax rates and other information about taxes in that region.
In this tutorial, I will show you how to create and manage Tax rates in the osCommerce store. So, Let’s get started.
Adding Tax Rates in osCommerce
To create a new tax rate, log in to the admin panel of your osCommerce store and click on the Locations / Taxes -> Tax Rates option from the left sidebar.
On this page, you will see a list of tax rates available in your store. To create a new tax rate, click on the New Tax Rate button given at the bottom-right corner of the table.
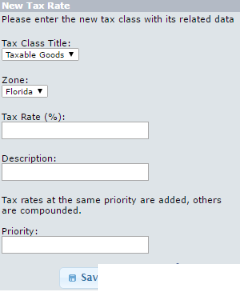
Now, Enter the tax information about the Tax rate you want to create. One important thing to note here is Zone. If you do not know what is zone and how to manage zones, learn from
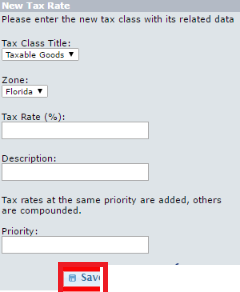
After entering all the required information, click on the Save button given at the bottom of the form to save a new tax rate. Now, When a user from that zone makes a purchase, he/she will be taxed according to the tax rate applied to the zone he/she is from.
So, this is how you can manage and create tax rates in osCommerce. I want to remind you again, If you do not know much about zones and managing zones in osCommerce, I highly recommend you learn that first.


