A downloadable product is a type of product that allows shoppers to get it as a file, such as an eBook, music, video, software application, or update. We can use a downloadable product to deliver an electronic version of your product catalog. The steps to create the downloadable product for your Magento store are listed below.
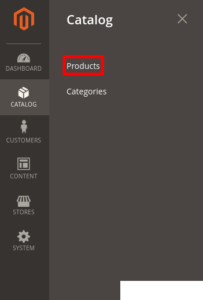
1) Login to Magento admin panel. On the Admin sidebar, select ‘Products’ from the ‘Catalog’ section.
2) Select ‘Downloadable Product’ from the ‘Add Product’ menu.
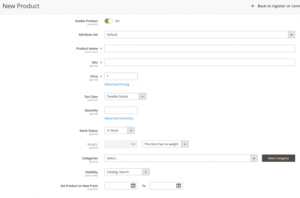
3) Fill out the required fields on the resulted screen.
Product Name: Enter the Product Name.
SKU: Either you can use the default SKU for the product, or offer another value.
Price: Enter the Product Price.
Tax Class: According to your concerns set Tax Class to None or Taxable Goods.
Quantity: Enter the Quantity of the product.
Stock Status: Select the current stock status from the drop-down menu.
Weight: Skip the Weight field.
Categories: Select the desired category from the drop-down menu.
4) If you wish to write some product description in the ‘Description filed’, you can do it by expanding the Content section.
5) By expanding the section ‘Downloadable Information’, in the ‘Links’ section, enter the Title for the download links you want to use. Then add new link by clicking the Add New Link button. After that enter the Title and Price of the download. From the two options (Attach File (File) or Enter Link (URL)), select the distribution methods as your wish. In the Sharable field, select Yes if you wish customers to login to their account before accessing the download link. Otherwise select No, so your clients will get the link via their email and enable to share with others. In the Max Downloads enter the number of times clients can download the link. To allow unlimited downloads, mark the Unlimited checkbox under the Max Downloads option.
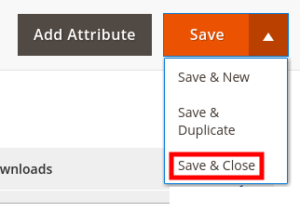
6) Set the ‘Product Online’ switch to ON and then click the ‘Save & Close’ button.
If you need any further help, please do reach our support department.


